Custom Playstation 5 Controller
Hello, there! Since I was in high school, I have enjoyed spicing up controllers, consoles, and even some toys with a custom paint job. I like taking something generic and making it unique. Back in the day, I took an Optimus Prime toy and gave it a new coat of paint to look like Nemesis Prime, it was glorious but I’m pretty sure that now lives in a box in my parents’ attic. Last December, my brother commissioned a custom controller from me. It had actually been a little bit since I had done one, and I had quite a bit of fun getting back into the swing of it. Okay, enough of the recipe blogger intro, first thing I did was draw up a couple of sketches for my brother to zero in on a design.
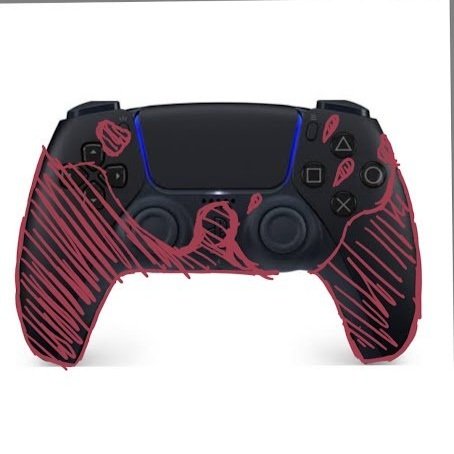
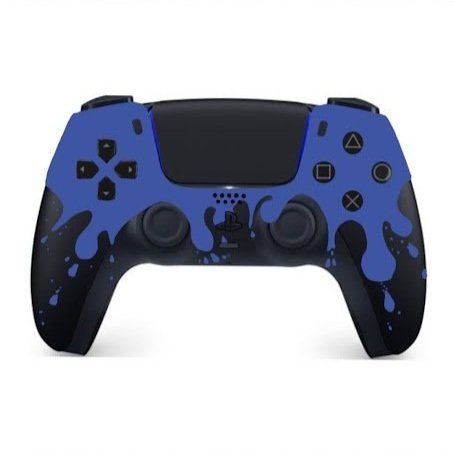
He knew that he wanted some kind of a splatter pattern. He had previously decorated a PS4 controller for himself, and went with a sort of paint brush flick, light pattern splatter. For the new controller, he made it clear that he wanted something that would look more cartoony, less speckled and more big drips of paint. I went with something that was intended to feel like it was thrown grips-first into a puddle of paint, with the splatter rising up from the bottom. For contrast, I did the sketch in red, but we both agreed that blue would be a good color for the final product as the red looked a bit too much like blood and that wasn’t what he was looking for.
The main note he gave me was that the splatter would look better coming from the top, other than that, he requested more variety in the size of the drips. I think both of those ideas resulted in a much better final product, and he seemed to be satisfied with the result. I ended up following the concept above fairly accurately in the actual project. Now that we had decided on a design, it was time to get to work. Before I could do anything, though, I had to take the controller apart.
I was a little bit rusty, so I made sure to have a guide video up on the screen and went through the process meticulously- even going so far as to pull up a separate guide because the one I was using was for a slightly older model of the controller, and Sony had since replaced some screws with plastic tabs, presumably to save money on hardware. All in all, it came apart pretty easily, although I did have to disassemble more of the internal components than I would really have liked to be able to do this. On older controllers I worked on, everything was contained in a sort of inner chassis, with the outer shell attached to that, separate from all the components. These controllers have quite a few more features crammed into the same space, so they have had to get more creative with where ribbon cables are run. All to say, there was quite a bit of dismantling before I got to paint.
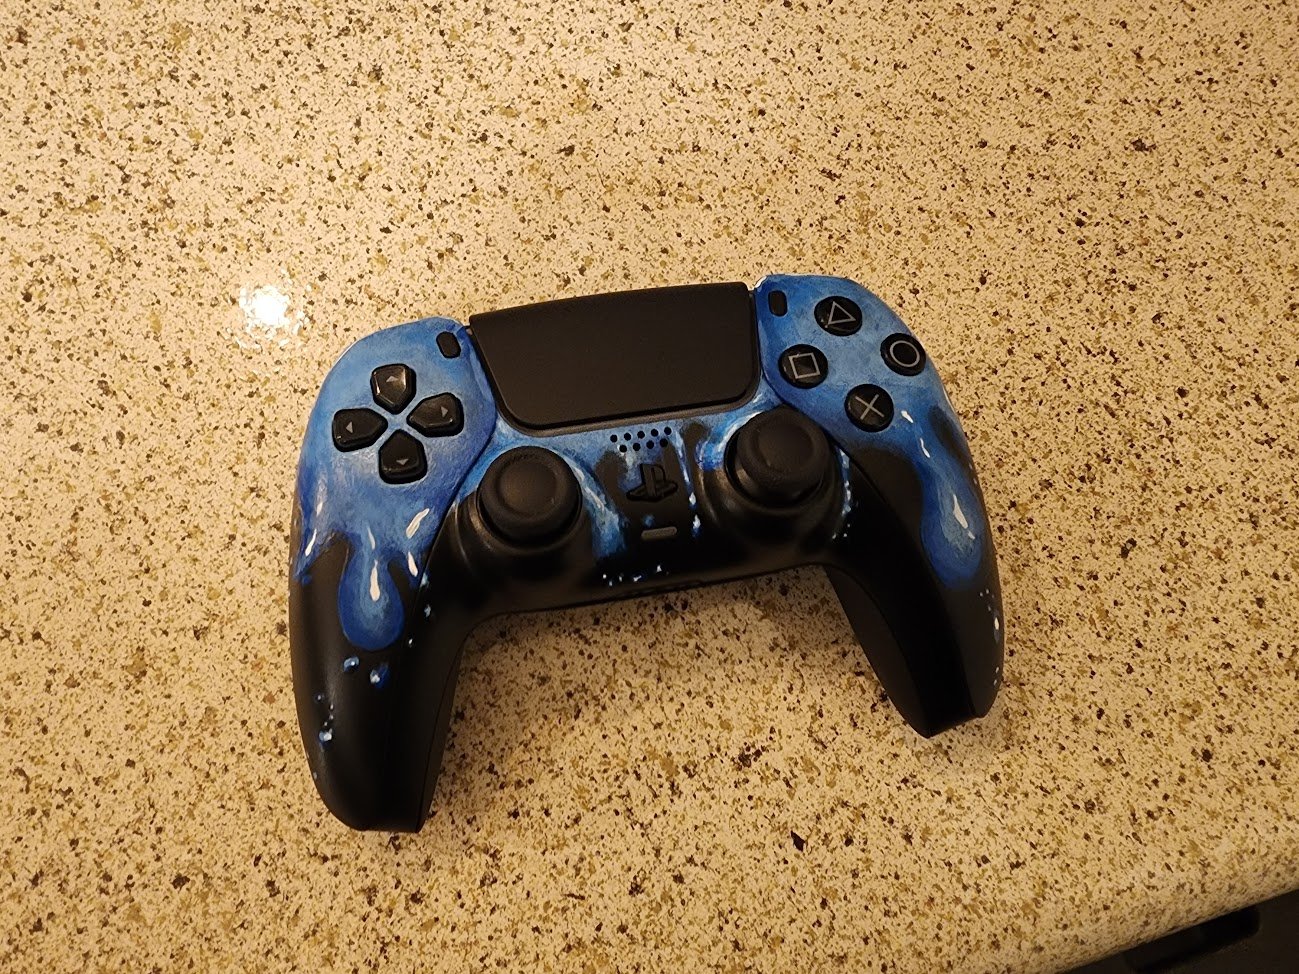
Not having prepared a concept sketch for the back, I just sort of flew by the seat of my pants. I think I managed to keep the same kind of splatter pattern as I have on the front, but I do thing that it looks a little too even, almost like all the globs are in a single file line, looks a bit weird to me, but it’s on the back. The front came out spectacularly, and looks just like the sketch but better. I painted this with acrylics, starting with a gentle sanding over the whole shell, and a layer of primer to make sure everything stuck nicely. I sealed it up with a couple layers of waterproof satin finish. My brother requested that it be shiny, but not so shiny that it outshined the painted shines. I think I managed to achieve that.
The controller came back together extremely nicely, everything fit the way it was supposed to for the most part. I did have a couple of minor snags, the front plate that goes around the thumb sticks and PS button is a sort of compression fit where it tucks in around the touch pad, with an additional layer of paint, that definitely took a little extra force to put back in there than it did during my test reassembly. The other issue was a little more significant. I didn’t notice that one of the function buttons at the top of the controller was sticking. Those small, oval buttons fit very snugly into the holes in the shell. When I painted, even with the masking tape I had applied, a small amount managed to drip into that hole and cause some friction with the button after it was reassembled. Picture not related, just a prettier picture on my brother’s counter:
I was able to fix up the stuck button fairly easily by taking the controller back apart, and scraping out the inside of the hole with a knife. With that fixed, the controller worked perfectly and Alex has been using it happily since. I have his other controller, a white one, with me in the Shoudio and I will be giving it a fiery paint job to complete the set. That will be going down over on the twitch stream, you can find me there at this link. I’m looking forward to doing more projects like this, if you would like me to customize a controller or console for you please reach out to me through the contact page. Thanks for reading! It’s been a blast as always. I’ll see you in the next one.


