Summon the Leviathan! | Sculpting in VR
This week the video was another update on Everbound. I have been working on some models for mobs and NPCs…
Hello there! Playing catch-up this week as I fell behind on my edits last week. Which reminds me, I have some file conversions to do…
With that started, I can proceed. This week the video was another update on Everbound. I have been working on some models for mobs and NPCs, in fact, over the couple of years that I have been talking about this project, that’s most of what I’ve accomplished. Gameplay has barely been touched, but that changed as of today, which I will write up a post about very soon! For now, we will talk about progress on what may be one of the most important creatures in the game: a Zenith known only as the Leviathan. At some point, I may do a lore post about the world, as I have quite a bit to say about that.
The Leviathan is a massive, aquatic exoskeletal creature, I heavily leaned into the bug theming as things progressed. By the time I reached the end it was really starting to look reminiscent of a centipede. This first image shows me starting to design the mouth. The large, protruding arm-like structures are for defense and food collection. Large, armored jaws fold in to close the mouth completely, although it rarely occurs. Further back you can see the rest of the mouth, there is a large bowl-shaped section filling out the bottom jaw, and what looks like a… well… there is a uvula at the back of the throat. The mouth continues quite far down, as is visible in the image, so the whole edge ended up getting populated with those little arms like the ones at the top. The arms got larger as they went down, with the second to last set having a shielding panel and more dexterity.
The eyes ended up being very spider-like. I think it adds an alien look to the face. It feels like it’s looking everywhere and nowhere all at once. I love it. It’s also just very creepy, which is a main goal for this model. In the world of the story, this is the biggest, baddest beast you can find. Intended to be seen fairly early on and every so often throughout your playthrough, the Leviathan will stand as an Everest for players to take on after they have gained all the strength they can from the rest of the world. It can be killed, but not easily. Not necessarily either, this game will be about choice, and like any other you can skip this one or try an alternate tactic.
In this image there are tendrils coming from the mouth. Those are mostly aesthetic, and will likely be luminescent in the final design. I made a fairly annoying error by adding that feature too early. I should have waited until the sculpt was done, as their shape causes them to sweep back past the other panels on the body, which put them squarely in the way of just about everything else I had to do.
For the underside of those jaws, I did my best to make them look very fleshy and foldy. The rest of the body is armored, so the soft underbelly should be very visually distinct. On a smaller model, I generally would not include that as an actual surface detail in the mesh, but rather evoke the material with textures and normal maps. In this case, however, we are dealing with a seriously gargantuan creature. For scale, the player will be around as tall as the third smallest arms at the top of the mouth. At that size, if the texture isn’t present in the model, a player will notice. Honestly, I don’t even know how I’m going to make this thing work at close proximities, but boy will it be cool if I can.
As I mentioned earlier, the tendrils were very in the way while I was working on the remaining panels. I also found that I started to run into performance issues as the model became more complicated. Running the VR modeling program, Medium, along with OBS, a plug-in to stabilize the VR output, and Twitch to watch chat, my computer was starting to strain. Especially with a creature like this, I think the lesson is that it should have been done in sections. I should have stopped after making the front segment with the face and the straight section behind. I then should have made a separate model representing a body segment. That way, for animation, I can duplicate and alter that body segment and parent it to different points along the surface of the tail section. I likely will still do that, actually, although it will mean repeating some work…
As it stands, I think the model looks very promising. It’s creepy. If I saw this thing from a distance I would think for a while before approaching, and that is exactly the vibe I am looking for. Next time you see it, we will be working on animation for our hard-shelled friend here, and possibly an additional creature for the game. This week I started working on NPC controller scripts in Unity and I will soon be back to testing out some of the player recognition features in my chatbot, so if you want to follow along and participate, please do join over on Twitch! Don’t forget to watch the video to see the project in action. Thanks for reading, it’s been a blast as always! See you in the next one!
Everbound - Map Layout
Happy to share an update on my progress with the video game concept, Everbound.
Hello all!
Happy to share an update on my progress with the video game concept, Everbound. In a recent livestream on Twitch, I focused on creating the 3D map layout for the game. It has been thrilling to finally see the map come to life as I make more and more progress. In this stream, I was able to get the map roughed out at a high level of detail, and more or less outline a plan to complete the map.
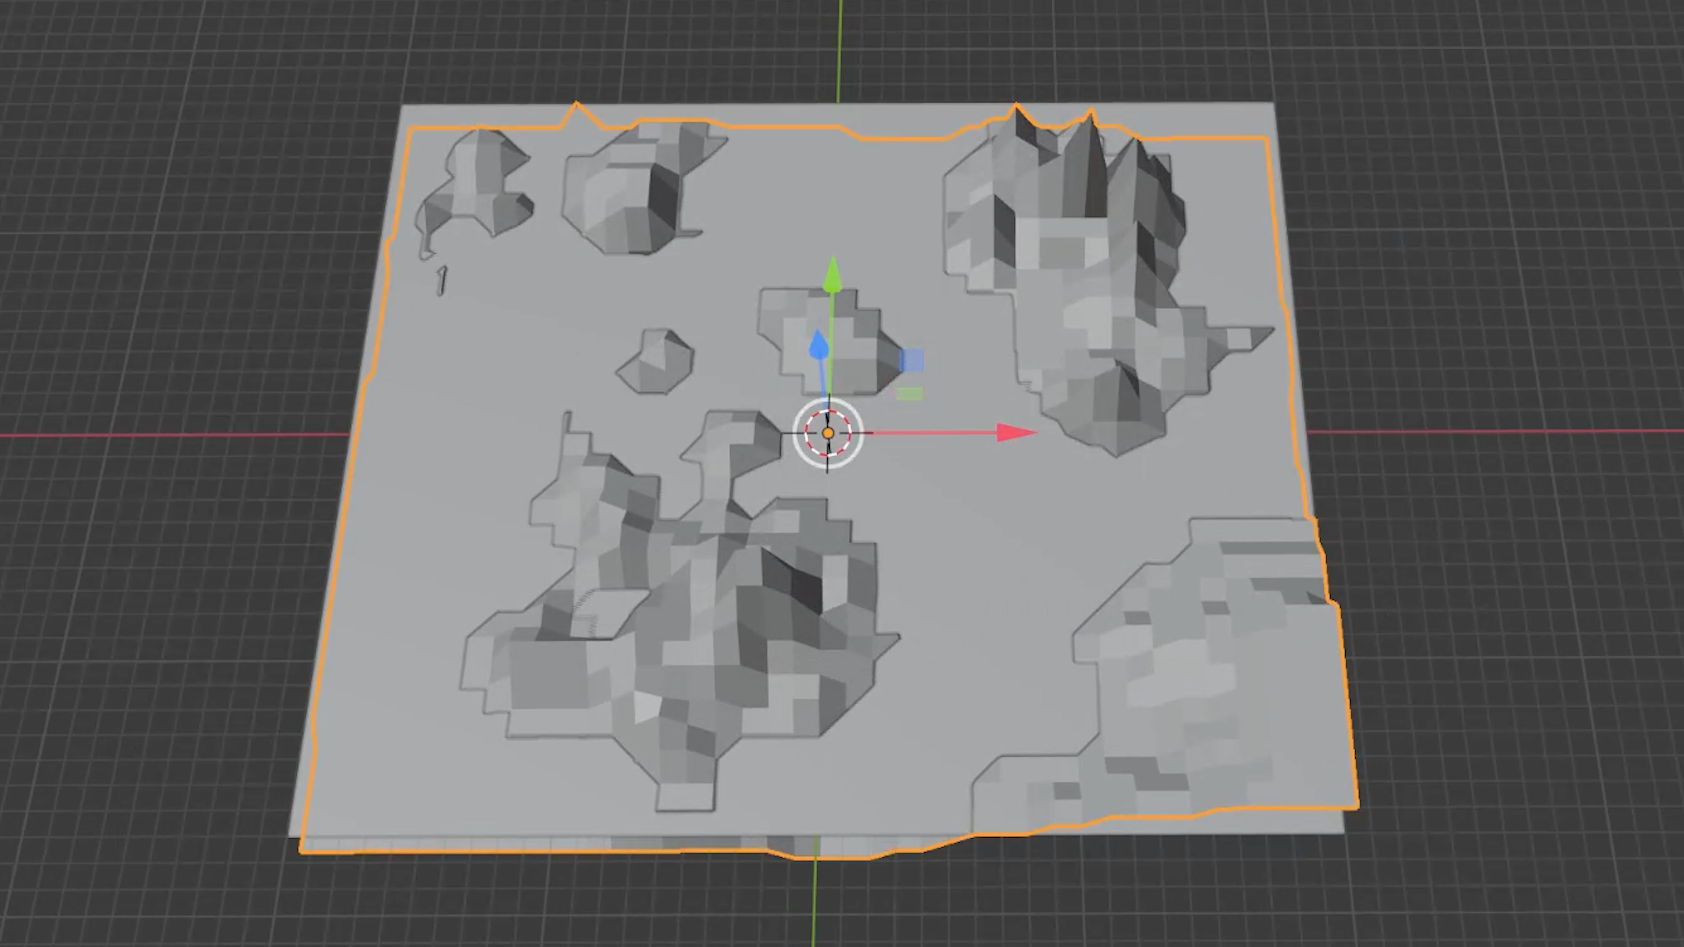
The process started with a 40x40 grid of squares, with each square representing 1 kilometer, and my hand-drawn map scaled up to match. I followed the topography lines on the map and set the depth levels at 1km increments to maintain a 3 dimensional grid. Most of the terrain was fairly straightforward, but some areas heavy with detail -such as small islands or narrow passages- were a little more difficult to represent accurately without a finer touch.
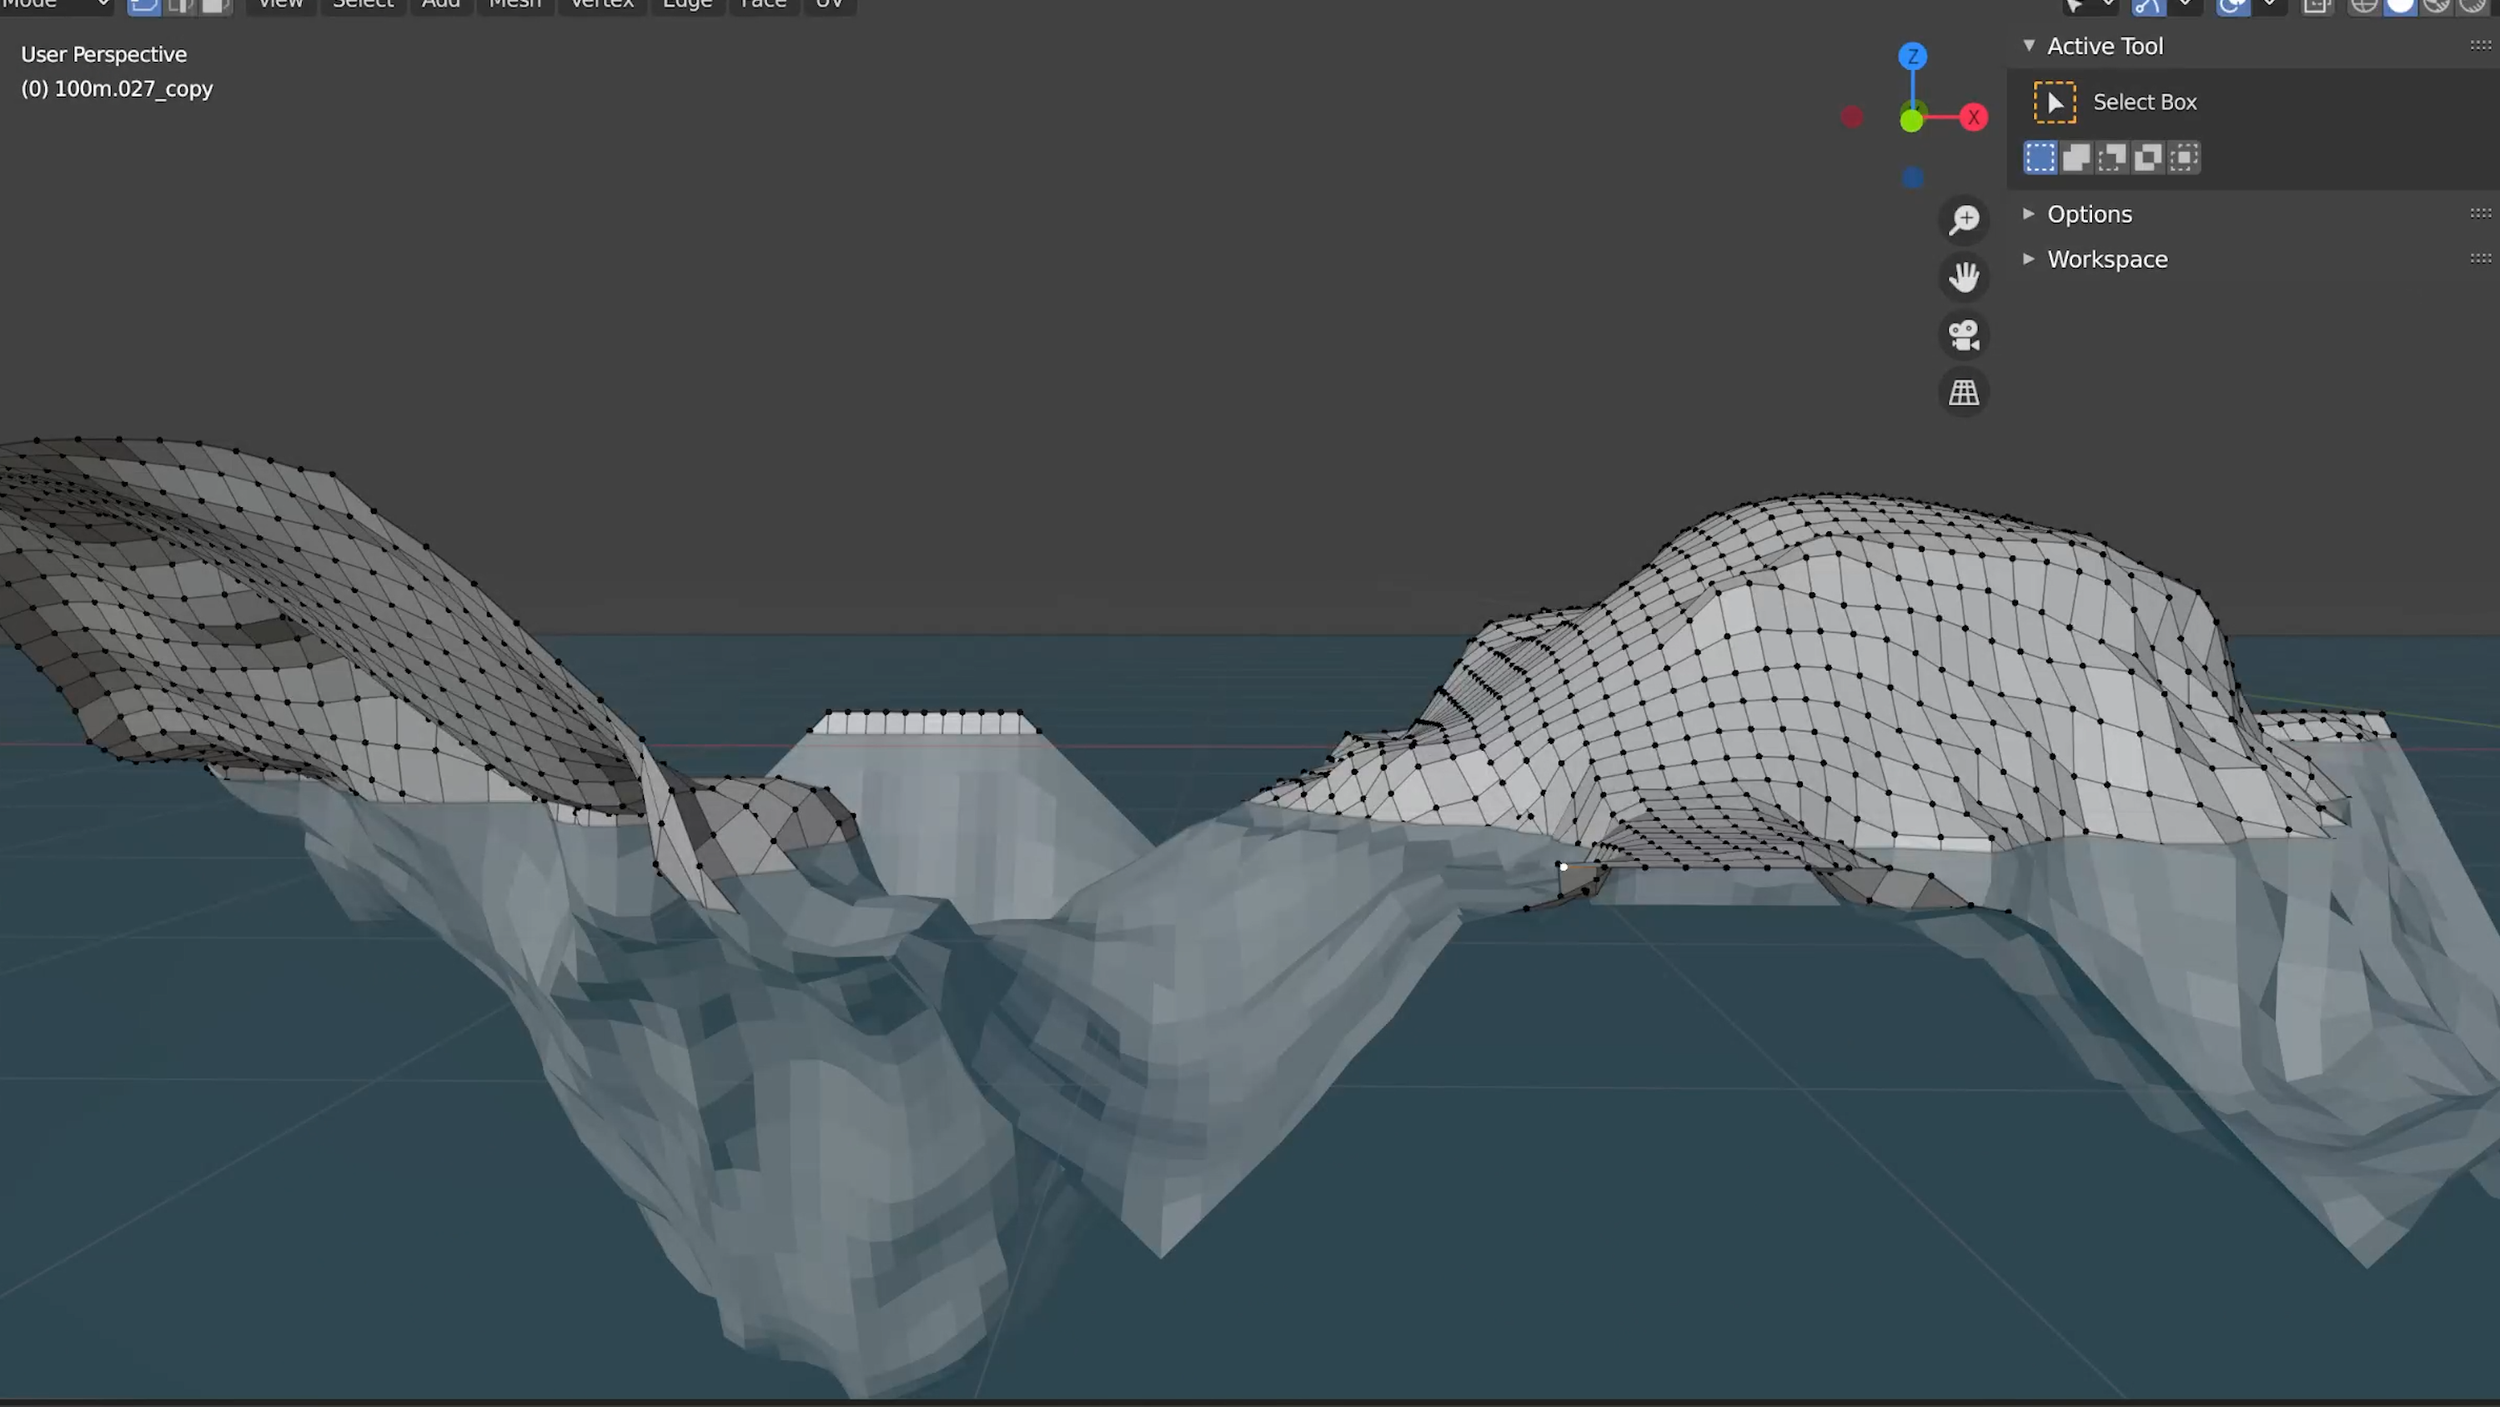
In the second half of the stream, we zoomed in on a particular section of the map known as Crown’s Ridge. I selected that section of the grid and separated it from the rest of the mesh, increasing the resolution using the subdivide tool. I set it to 9 subdivisions, leaving us with a grid size of 100 meters per square. I added a flat mesh at water height to help show the coastline, and with a recommendation from chat we were able to make that plane transparent to create a more realistic water effect which made it much easier to visualize the progress.
To achieve this next level of detail, I switched over to sculpt mode and first smoothed out all of the sharp corners from the lower resolution map, then I carved ridges and added mounds and hills to the surface of the mesh. I did my best to visualize rainwater flowing down the surface. I wanted to think about how water creates a positive feedback loop and, the more an area is eroded away by the rain, the more rain is drawn to that path and the deeper the scar becomes. This became more relevant after the stream, while I was working on the volcano, one of the largest landmasses on the map.
By the end of the livestream, I had completed the second level of detail for 2 of the 64 sections into which the map is broken up. As I mentioned, I continued working after the stream and managed to complete another 4 sections. The map is fairly large, but I don’t intend to complete this level of detail across the entire map before moving on. My plan is to focus on the areas where I have already made progress before moving on to the rest of the map. I want to add more surface details and buildings, as well as establish a visual style and gameplay mechanics in a small testing area before rolling through the entire world.
There is still a lot to be done, but I am excited to see how this game evolves as I continue to work on it, and I can’t wait to share updates with you all. Thank you for your continued support and encouragement as I bumble through the world of game design, it’s been a blast as always. I’ll see you in the next post!


